
Moss Mini Mushroom Terrarium Kit Instructions
Welcome to Urban Sprouts! We are a full service houseplant shop / clinic and community. We offer in person and digital services, resources for plant lovers of all skill levels. Learn more about Urban Sprouts
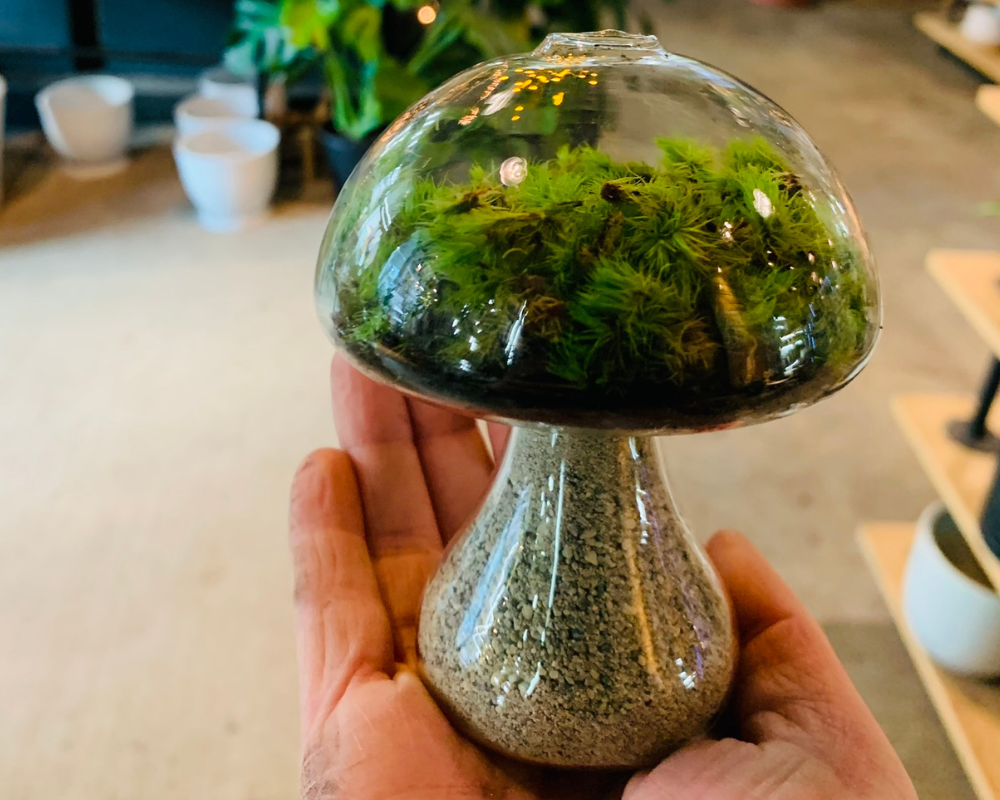
We are hope you enjoy this moss mini mushroom terrarium kit! Inside you will have everything you need to make a maintience free and simply stunning little mushroom shaped moss terrarium.
If you have any questions or there are any issues with your kit on arrival don't hesitate to reach out!
Local to the Seattle area? Make your kit at our terrarium bar! Our

Before you get started
In addition to the contents of your kit you will need a small bowl of water to rehydrate your moss. You may also want to have a towel, or mat laid down under your workspace to protect your surface from any scratches or soil. You may also want a funnel to help you get sand, soil, and biochar into the container. Funnel not required, just keeps the process a little cleaner.
Included with your kit
- 1 Mushroom Terrarium Glassware
- 1 Small Packet Biochar
- 1 Dowel
- 1 Packet Terrarium Soil
- 1 Bag Dormant Natural Moss
- 1 Tube Gritty Sand or Decorative Gravel
Please note* packaging may differ slightly from photo
About your Mushroom Terrarium
The moss used in this terrarium has undergone a preservation process so that it will maintain its shape and color for years to come. After moss has been preserved it will no longer grow.
Your moss terrarium does not require watering once it has been assembled, however if you would like to keep it moist it will look and feel like live moss.
You may also choose to include small indoor plants in the terrarium in addition to the moss and feel free to add any decorative elements you'd like such as crystals, dried flowers or other small props that will fit into the glassware opening.
Video Instructions


Step 1: Sand/Gravel
Pour sand/gravel into glass mushroom vessel. Pour until stem of vessel is filled. If you would like to see a little of the sand layer on the side of your mushroom top add a little more sand until you get the desired look. Your kit includes enough sand/gravel that you will likely have extra.
Step 2: Biochar
Add a thin layer of biochar into the mushroom glassware. Add just enough to create a thin layer enough to cover the surface area. Use your dowel to distribute the biochar into a thin layer if its is piled in the center. It is ok if the Biochar mixes in with the sand a bit in the process.
What is biochar?
Biochar is a PH balanced, nutrient enhanced, activated charcoal that is often used as a fungal/bacterial suppressant and natural PH control in horticultural settings. It is a key ingredient in terrariums that helps prevent mold or mildew from growing inside the terrarium in warm and or wet conditions.

Step 3: Soil
Add a thin layer of soil into the terrarium through the opening at the top. You may use a funnel and the included dowel or use your fingers to pinch and poke small amounts at a time through the hole until you reach the desired thickness.
Note: Because your moss is preserved it does not require the soil to live .However in order to keep the moss looking lifelike an evenly moist environment is best and the soil helps provide even humidity inside the mushroom that will keep your moss hydrated for longer. if you would like to add any living plants (including seeds) you will need about a 1 cm layer of soil.

Step 4: Moss
The moss inside this kit is preserved. It is real moss that has undergone a preservation process that will prevent rotting, or crumbling and it will maintain the current coloring. It will also be pliable, moist and soft just like live moss when rehydrated but it will not grow.
To rehydrate your moss:
Remove moss from package and submerge in cool water for 15 - 30 seconds. Remove from water and squeeze out excess.
Remember: This moss has been preserved so you can not hurt it by ringing it out.
Cut or tear rehydrated moss into small pieces and feed into the hole at the top of the terrarium. Use the dowel to position, fluff and move moss around inside the terrarium until you get the desired look and fullness you'd like.
After your moss is in place feel free to add any other decorations you might like to make it your own! Some of our favorites include dried flowers, small crystals, or tiny figurines.
Care for your Terrarium
Nice work! Your terrarium is finished!
If you did not include any plants from outside the kit you can choose to either keep your new terrarium hydrated or allow it to dry out again for a zero care.
Your moss terrarium does not require any light. Keep damp to keep the moss looking lush and lively. Add a few squits of water into the hole as needed or pour some water and drain off any excess.
If you allow your terrarium to dry out you can rehydrate the moss at any time by applying water.
If mold or mildew appers mix hydrogen peroxide and water 1:1 and gently mist the inside of the terrarium.


Kokedama Project Kit
